Skip navigation bar
Vibrapod Isolator
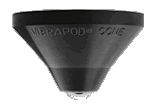
Vibrapod Cone

The Vibrapod Company

623 Hanley Industrial Court
St. Louis, MO 63144
Phone (314) 645-2900
Fax     (314) 645-6700

VIBRAPOD Isolator Installation

VIBRAPOD Isolators can leave rings on woods, acrylics, and painted surfaces.
See Precautions.

The following are general rules for installation of VIBRAPOD Isolators.

Typical Arrangement

If the feet of your component are at least 1 5/8" in diameter the dome of the Vibrapod Isolator can be placed directly under each foot.

Feet between 3/4" and 1 9/16" can be placed on the central island of the base of a VIBRAPOD Isolator. We recommend this for lighter components until we have completed further weight testing. The VIBRAPOD Cone may also be placed on this central island.

If the feet are small, under 3/4", do not put them into the center of the Dome of the VIBRAPOD Isolators as the foot could bottom out and the VIBRAPOD Isolators will not work.

Spikes placed in the center of the VIBRAPOD Isolators will have no effect. However, some customers have used a round piece of metal or acrylic, with an indentation in it's center, on top of the dome so that spikes can be used with VIBRAPOD Isolators.


componentand feet


Removing the component's feet allows you to put VIBRAPOD Isolators directly under the component. In this instance you can place more than four VIBRAPOD Isolators under the component.

Dome Up Or Dome Down

podsup


THE VIBRAPOD SANDWICH

In some instances it may be necessary to make a VIBRAPOD Sandwich because the bottom of your component is irregular, the feet used by the manufacturer are too small, or the component is a turntable.

In this arrangement your normal shelf acts as a base for the VIBRAPOD Isolators and a second shelf sits on top of the VIBRAPOD Isolators and your equipment on the second shelf.

Use the combined weight of the component and the second shelf to determine the best model VIBRAPOD Isolators to use when making a VIBRAPOD Sandwich. Keep the weight of the second shelf low by avoiding materials like granite. Good choices are 1/2" thick MDF and Acrylic. Tempered Glass can be used but is not our best choice.

This is the best way to isolate a Turntable. Use more of the lower model VIBRAPOD Isolators for the best results with Turntables.


Dome Up Or Dome Down

sandwich


The Heavier On One Side Problem

The First Method
Using Various Model
VIBRAPOD Isolators

Combinations of Models 1, 2, 3, 4, and 5 VIBRAPOD Isolators will alleviate this problem.  Place the Model 3, 4 or 5 VIBRAPOD Isolators under the heaviest area of your component and either the Model 1, 2 or 3 VIBRAPOD Isolators under the lighter areas.  This way you can mix and match for the best effect.

The Second Method
Using One Model VIBRAPOD Isolator

You can't just put VIBRAPOD Isolators along front and back because the weight distribution is so uneven. For the VIBRAPOD Isolators to work their magic the equipment is going to sit off-center on a new shelf.

Determine the shelf depth.

  1. Slide a hardwood dowel or cut off broom handle under the chassis from the side.
  2. Gently roll the amp front to back over the dowel until you find the center of mass or balancing point.
  3. Mark this point on each side of the chassis.
  4. Measure the distance from that point to the back of the component and to the front.
  5. Multiply the larger dimension by 2.
  6. Add 1 inch or 2.5cm to this number to get the total front-to-back depth of the shelf.

Determine the shelf width.

If the component is symmetrical from side to side then go to the next step.
If not then follow the same instructions for the shelf depth but start with the dowel under the component from the rear sliding the component from side to side to find the center of mass or balancing point.

Finish the project.

Add the weight of the shelf to that of the component. This gives you the total weight that the VIBRAPOD Isolators will be supporting.
Divide this weight by the following numbers.

Divisors for each model
Model 1
2.5
Model 2
6
Model 3
10
Model 4
16
Model 5
25
Cone
25
(10 for 3/8" Ball)
When combining VIBRAPOD Isolators and Cones use the weight that an Isolator can support for the combination.
  1. Place the VIBRAPOD Isolators down on the surface where your component will sit Dome side up. Arrange them symmetrically from front to back and side to side around the perimeter. You don't have to worry about the uneven weight distribution of the component.
  2. Put the shelf on top of the VIBRAPOD Isolators.
  3. Place the component on top of the shelf.
    Position it so that its front and side edges are 1/2-inch (1.25cm) in from the front and side edges of the shelf.
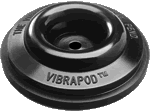
Do not put VIBRAPOD Isolators in a close Triangular Formation. By close we mean touching as in the illustration below.

vibtripod.jpg (65729 bytes)

VIBRAPOD Isolators may be stacked but we see no real benefits unless you want to transfer money from your account to ours.

It is easiest placing VIBRAPOD Isolators using several wood blocks under the sides of your equipment and then sliding the VIBRAPOD Isolators in using a long spoon or fork.  They will slide easiest with the Dome facing up.

The VIBRAPOD Sandwich should be used with Tube amplifiers, any component that runs hot, and Turntables.


Awards


TAS Editors Choice


TAS Best Buy


Stereophile Recommended Companent
Since October 1998


Reviewer's Choice


Vibrapod : the Affordable Alternative.